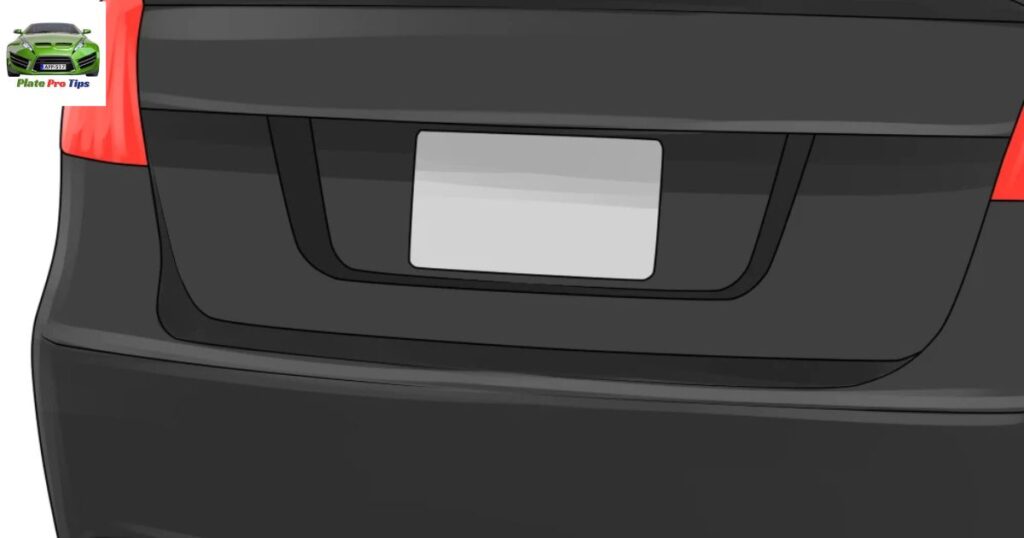
Changing license plate lights involves replacing the bulbs that illuminate the license plate on a vehicle. This simple maintenance task ensures proper visibility and compliance with road regulations. Typically, it requires removing the license plate cover, accessing the old bulbs, and installing new ones. Regularly checking and changing license plate lights is essential for safe driving at night and avoiding potential legal issues.
Discover the quick and easy way to enhance your vehicle’s visibility at night with our step-by-step guide on How to Change License Plate Light. Illuminate your license plate effortlessly by following our simple instructions. Don’t let dim lights go unnoticed take action now and ensure your safety on the road. Upgrade your visibility in just a few minutes by diving into our hassle-free tutorial.
Changing a license plate light is a straightforward process that involves replacing the bulbs illuminating your vehicle’s license plate. Typically, it requires removing the license plate cover, accessing the old bulbs, and installing new ones. This quick and easy maintenance task ensures proper visibility at night and helps you stay compliant with road regulations.
Before Learning How to Change License Plate Bulb
Before delving into the intricacies of changing a license plate bulb, it’s crucial to first understand the type of bulb needed for your vehicle. Familiarizing yourself with the specific steps and tools required is essential to ensure a seamless and successful replacement process. Additionally, it’s worth noting the significance of deciphering various codes on a license plate. For instance, understanding the meaning of F P Mean On A License Plate can provide valuable insights into regional identifiers and special designations. Now, let’s proceed with the steps to change your license plate bulb.
Additionally, checking the vehicle’s manual for instructions tailored to your make and model can provide valuable insights. Taking necessary safety precautions, such as disconnecting the battery, is crucial before delving into any automotive maintenance task.
Are All License Plate Lights the Same?
No, not all license plate lights are the same. While they serve the common purpose of illuminating license plates for visibility, variations exist in terms of design, brightness, and technology. Some vehicles come equipped with LED lights, while others may have traditional incandescent bulbs, leading to differences in appearance and performance.
How Do I Know if My License Plate Light Is Out?
Checking if your license plate light is out is a straightforward task. Simply turn on your vehicle’s headlights and walk to the rear of your car to inspect the license plate area. If the light is not illuminated, it may be time to replace the bulb or check for a potential electrical issue.
Ensuring your license plate light is operational is crucial for safety and legal compliance. Regularly inspecting and maintaining these lights contributes to overall road visibility and helps avoid potential traffic violations.
If the Light Is Flickering Off and On, You Need to Replace It
If your light is flickering intermittently, it’s a clear sign that it needs replacement. Faulty bulbs can disrupt consistent illumination, so swapping it out for a new one will restore steady and reliable lighting in your space.
If Your Rear Bulb Seems Foggy
If your rear bulb appears foggy, it might be a sign of moisture or dirt accumulation on the surface. Clearing or replacing the bulb can improve visibility and ensure proper functioning of your vehicle’s rear lights.
If Lamps Are Not On When the Headlights Are Turned On
If the lamps are not illuminated when the headlights are turned on, it may indicate a potential issue with the vehicle’s lighting system. It is advisable to promptly check and replace any faulty bulbs or address electrical issues to ensure proper visibility and compliance with road safety regulations.
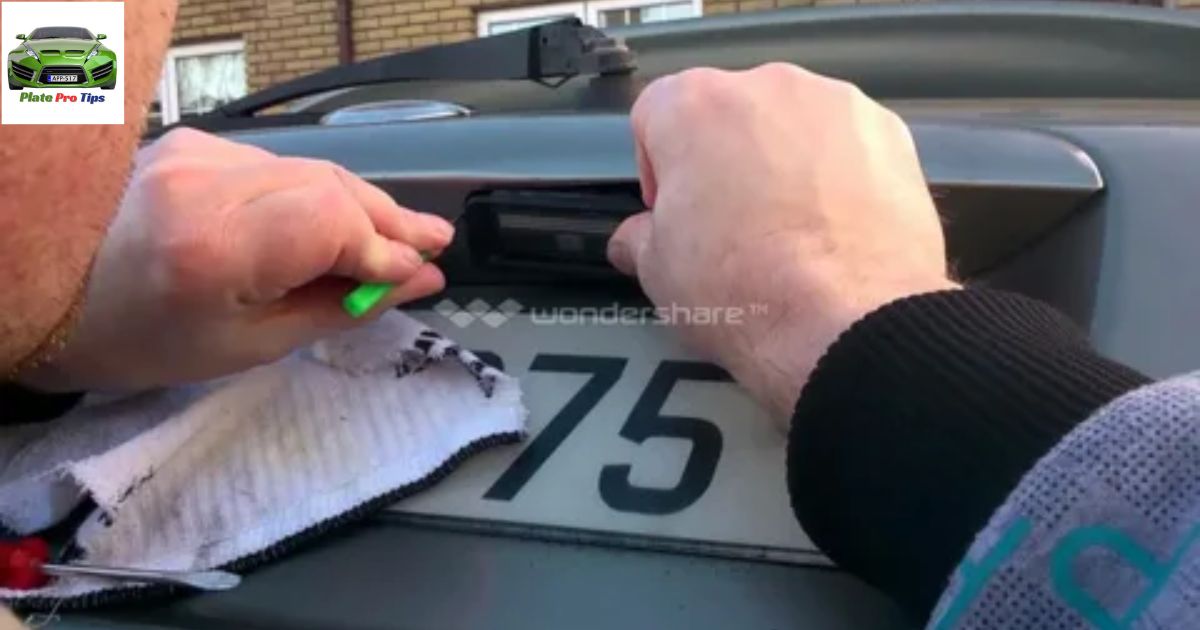
How to Replace License Plate Light Bulb?
To replace a license plate light bulb, first, locate the housing unit behind the license plate. Once found, remove the screws or clips securing the cover, and then replace the old bulb with a new one of the same type. Finally, reattach the cover and ensure it’s securely fastened.
Remember to check your vehicle’s manual for specific instructions and bulb specifications. Regularly inspecting and replacing license plate bulbs ensures optimal visibility and keeps you in compliance with road regulations.
Replace Both Lamps at the Same Time
- When replacing car lamps, it’s advisable to replace both at the same time.
- This ensures uniform brightness and consistent performance from both lamps.
- It also prevents uneven wear and maintains optimal visibility for safer driving.
- Check your vehicle’s manual for guidance on the recommended replacement intervals.
- Replacing both lamps simultaneously is a simple yet effective maintenance practice.
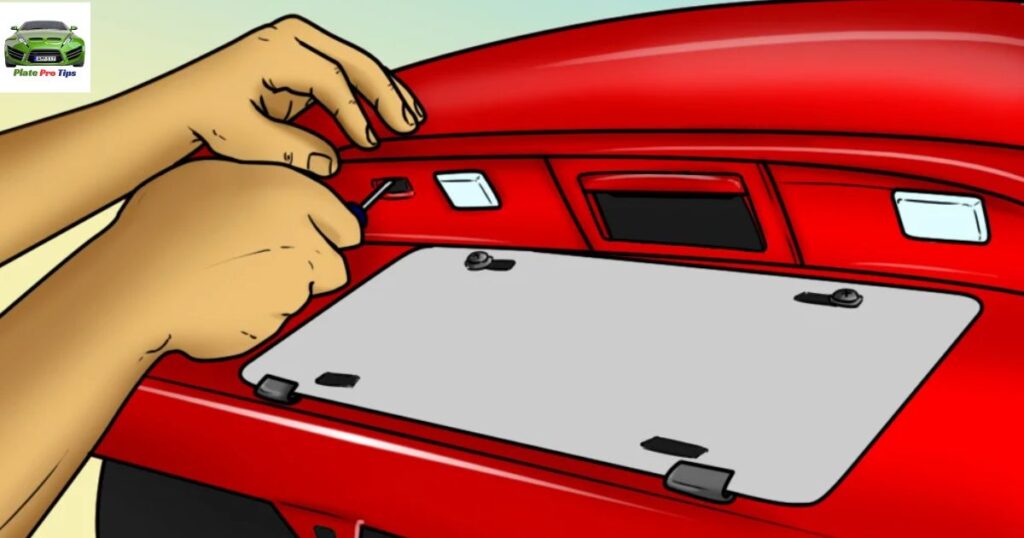
The Screws on the Vehicle’s Light’s Covers Should Be Loosened
To ensure proper maintenance, it is advised to loosen the screws on the vehicle’s light covers. This simple task facilitates easy access for cleaning or replacing bulbs, promoting optimal visibility and safety on the road.
If the Lights’ Bases Are Attached to the Bumper, Rotate It From Underneath
To detach the lights’ bases attached to the bumper, simply rotate them from underneath the vehicle. This straightforward maneuver allows for easy removal and maintenance of the lights without the need for complex tools or disassembly.
Pull the Lightbulbs Straight Out
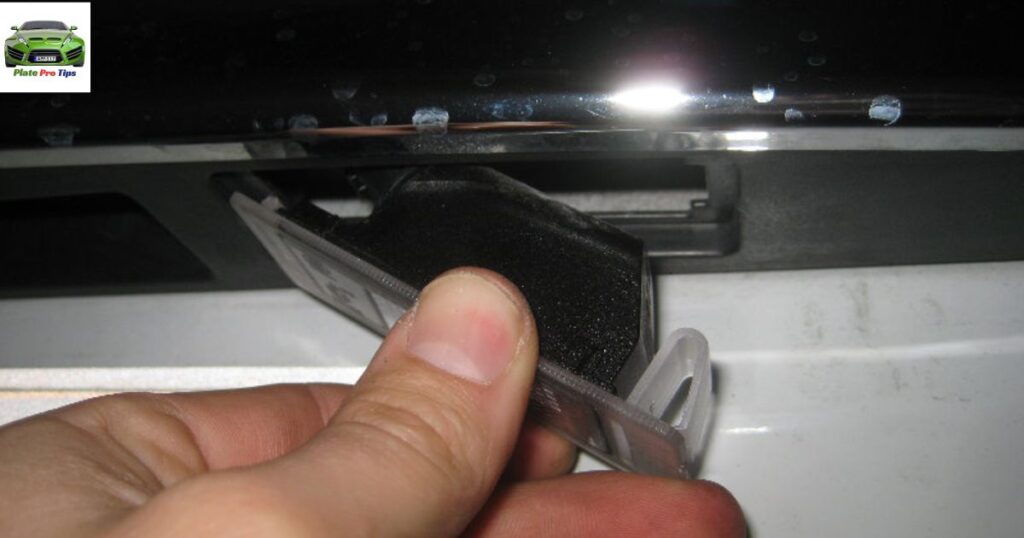
- To remove the lightbulbs, grasp them firmly.
- Gently pull the lightbulbs straight out from their sockets.
- Ensure a smooth and direct motion to avoid any damage.
- This simple step allows for quick and hassle-free replacement.
- Always disconnect the power source before handling lightbulbs for safety.
New Tag Lights Should Be Pushed Into the Slots
In order to install new tag lights, gently push them into the designated slots. Ensure a secure fit to guarantee proper functioning.
| Action | Instructions |
| Install New Tag Lights | Push lights gently into designated slots |
| Ensure Secure Fit | Confirm proper placement for effective function |
Turn Your Car On and Check if the Lamps Are Working
Ensure your car’s safety by starting the engine and verifying the functionality of your lamps. A quick check can help you drive confidently with properly working lights.
Secure the Lamps by Reattaching the Cover
To ensure the lamps are secure, reattach their covers securely. This simple step not only enhances safety but also maintains the overall aesthetic of the lighting fixtures.
How Do You Change a Car Interior Light?

Changing a car interior light is a straightforward process that typically involves locating the light fixture, removing the cover, and replacing the old bulb with a new one. It’s essential to consult the vehicle’s manual for specific instructions and ensure the car is turned off before attempting the replacement to guarantee safety.
Remember to use the appropriate type and wattage of bulb recommended for your car model to ensure compatibility. Once the new bulb is securely in place, carefully reattach the cover, and your car’s interior light should be shining brightly again.
FAQ,s
How do you replace a plate light?
To replace a plate light, locate the light housing, unscrew the old bulb, insert a new one, and securely screw the housing back in place.
How do you remove a number plate light?
To remove a number plate light, typically unscrew the housing cover, detach the old bulb, replace it with a new one, and then secure the cover back in place.
Can you have lights around your license plate?
Yes, you can have lights around your license plate, but it’s important to check and comply with local regulations to ensure they are legal and do not violate any restrictions.
How do you change the number plate light on a Skoda Octavia?
To change the number plate light on a Skoda Octavia, locate the light housing, remove the cover, replace the old bulb with a new one, and secure the cover back in place.
How can I change my lights?
To change your lights, locate the fixture, replace the bulb, and follow the specific instructions in the user manual for your lighting system.
Conclusion
Changing a license plate light is a simple task that involves a few easy steps. Begin by locating the license plate light housing on the rear of your vehicle. Once identified, remove the screws securing the cover, take out the old bulb, replace it with a new one, and securely reattach the cover. Ensure the replacement bulb matches the recommended specifications for your vehicle, as mentioned in the user manual. By following these straightforward instructions, you can easily change your license plate light and maintain proper illumination for safety and compliance.
In summary, the process of how to change a license plate light boils down to identifying the light housing, replacing the old bulb with a new one, and securing the cover back in place. This quick and hassle-free task can be accomplished with basic tools, and it’s crucial to use the correct type of bulb as specified in your vehicle’s manual to ensure optimal performance. Taking a few minutes to change your license plate light ensures that your vehicle remains visible and compliant with regulations, contributing to safer travels on the road.

I’m Shoaib, a passionate blogger with 5 years of experience. I love writing about tech. My goal is to share useful information and insights with you. Explore my website to discover exciting content on various topics!